とりあえず Wordpress のインストール
Mac の初期設定を前提に話します
あ、僕初めて wordpress インストールする( & PHP の経験も少ない)のでセオリーと違う可能性大です><
PHP モジュールの読み込み
$ sudo vim /etc/apache2/httpd.conf
Apache の設定ファイルに以下の行を追加
LoadModule php5_module libexec/apache2/libphp5.so
で適当な場所に wordpress のリポジトリのコードをコピー
$ cd ~/Sites
$ svn co http://svn.automattic.com/wordpress/trunk/ wordpress
A    wordpress/wp-pass.php
A    wordpress/wp-rss.php
A    wordpress/wp-comments-post.php
A    wordpress/wp-login.php
A    wordpress/wp-blog-header.php
A    wordpress/wp-rdf.php
A    wordpress/wp-load.php
A    wordpress/wp-includes
A    wordpress/wp-includes/class-snoopy.php
A    wordpress/wp-includes/default-filters.php
A    wordpress/wp-includes/feed-rss2.php
A    wordpress/wp-includes/post-template.php
A    wordpress/wp-includes/plugin.php
A    wordpress/wp-includes/locale.php
A    wordpress/wp-includes/feed-atom.php
A    wordpress/wp-includes/wlwmanifest.xml
:
:
Mac の場合は ~/Site は http://localhost/~username/ でアクセスできる設定になってるので、上のようにインストールしたなら http://localhost/~username/wordpress/ にアクセスする
wordpress の初期設定

「Create a Configuration File」をクリック

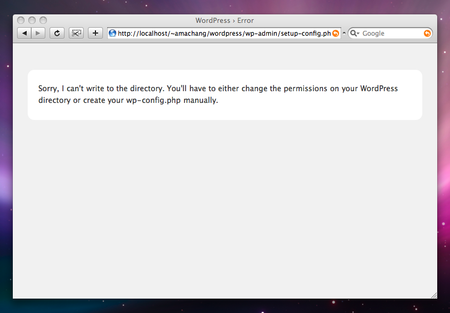
怒られた
パーミションを変える
$ chmod 777 ~/Sites/wordpress
リロード

「Let's Go」をクリック

フォームを埋める(そのまま入力しないでくださいテキトーにしました)

怒られた
MySQL5 をインストールする(MacPorts で)
$ sudo port install mysql5
--->  Fetching mysql5
--->  Verifying checksum(s) for mysql5
--->  Extracting mysql5
--->  Configuring mysql5
--->  Building mysql5 with target all
--->  Staging mysql5 into destroot
--->  Installing mysql5 5.0.51a_0
--->  Activating mysql5 5.0.51a_0
--->  Cleaning mysql5
$
MySQL5 の設定
$ sudo /opt/local/bin/mysql_install_db5 --user=mysql
$ sudo chown -R mysql:mysql /opt/local/var/db/mysql5/
$ sudo cp /opt/local/share/mysql5/mysql/my-small.cnf /opt/local/etc/mysql5/my.cnf
$ sudo vim /opt/local/etc/mysql5/my.cnf
MySQL5 の起動
$ sudo mysqld_safe5 &
wordpress 用データベースの作成
$ mysql5 -u amachang -p
Enter password:
Welcome to the MySQL monitor.  Commands end with ; or \g.
Your MySQL connection id is 7
Server version: 5.0.51a Source distribution

Type 'help;' or '\h' for help. Type '\c' to clear the buffer.

mysql> create database wordpress;
Query OK, 1 row affected (0.00 sec)

mysql>
リロードする
wp-config.php というファイルが出来たのでパーミションを戻す
$ chmod 755 ~/Sites/wordpress
「Run the install」をクリック
「Blog Title」と「Your E-mail」を入れ、「Install WordPress」をクリック
ユーザー名とパスワードをメモ
ログインする
やっとたどり着いた!
で、いろいろソースを見てみようと息巻いてたんですけど、どう見ても Gears を使ってる箇所は以下のファイルだけ
wp-admin/js/wp-gears.js
wpGears = {

	createStore : function() {
		if ( 'undefined' == typeof google || ! google.gears ) return;

		if ( 'undefined' == typeof localServer )
			localServer = google.gears.factory.create("beta.localserver");

		store = localServer.createManagedStore(this.storeName());
		store.manifestUrl = "gears-manifest.php";
		store.checkForUpdate();
		this.message();
	},

	getPermission : function() {
		if ( 'undefined' != typeof google && google.gears ) {
			if ( ! google.gears.factory.hasPermission )
				google.gears.factory.getPermission( 'WordPress', 'images/logo.gif' );

			try {
				this.createStore();
			} catch(e) {} // silence if canceled
		}
	},

	storeName : function() {
      var name = window.location.protocol + window.location.host;

      name = name.replace(/[\/\\:*"?<>|;,]+/g, '_'); // gears beta doesn't allow certain chars in the store name
	  name = 'wp_' + name.substring(0, 60); // max length of name is 64 chars

      return name;
    },

    message : function(show) {
		var t = this, msg1 = t.I('gears-msg1'), msg2 = t.I('gears-msg2'), msg3 = t.I('gears-msg3'), num = t.I('gears-upd-number'), wait = t.I('gears-wait');

		if ( ! msg1 ) return;

		if ( 'undefined' != typeof google && google.gears ) {
			if ( google.gears.factory.hasPermission ) {
				msg1.style.display = msg2.style.display = 'none';
				msg3.style.display = 'block';

				if ( 'undefined' == typeof store )
					t.createStore();

				store.oncomplete = function(){wait.innerHTML = (' ' + wpGearsL10n.updateCompleted);};
				store.onerror = function(){wait.innerHTML = (' ' + wpGearsL10n.error + ' ' + store.lastErrorMessage);};
				store.onprogress = function(e){if(num) num.innerHTML = (' ' + e.filesComplete + ' / ' + e.filesTotal);};
			} else {
				msg1.style.display = msg3.style.display = 'none';
				msg2.style.display = 'block';
			}
		}

		if ( show ) t.I('gears-info-box').style.display = 'block';
	},

	I : function(id) {
		return document.getElementById(id);
	}
}

function gearsInit() {
	if ( 'undefined' != typeof google && google.gears ) return;

	var gf = false;
	if ( 'undefined' != typeof GearsFactory ) { // Firefox
		gf = new GearsFactory();
	} else { // IE
		try {
			gf = new ActiveXObject('Gears.Factory');
		} catch (e) {}
	}

	if ( ! gf ) return;
	if ( 'undefined' == typeof google ) google = {};
	if ( ! google.gears ) google.gears = { factory : gf };
}

gearsInit();
ホントに以下の通り
この機能をオンにしても画像とスクリプトのローカルへのキャッシュをしているだけに見える。
WordPress2.6のGoogle Gears対応というのはオフライン投稿機能ではない | 秋元@サイボウズラボ・プログラマー・ブログ
Gears の機能を使ってるのは以下の三行だけ
		store = localServer.createManagedStore(this.storeName());
		store.manifestUrl = "gears-manifest.php";
		store.checkForUpdate();
うーん。
そもそもブラウザにキャッシュされるから、これ自体が必要な気がしない。
ブラウザのキャッシュより ManagedStorage のほうが速いのかなあ?
Speed Up リンクを押すと、スピードアップしてる風の画面が出るんだけど。

気分の問題なんじゃないのかなあ??
使ってみた感じは変わらない。
ちょっとよく分かりません